

iPhone is popular for the privacy. If you are the one who is looking for how to share calendar on iPhone without iCloud? this blog is for you. iCloud offers a beneficial feature of sharing your iPhone calendar with others, however, it might not be the ideal choice for all. You may desire more authority over your data or might be dealing with restricted iCloud storage, hence sharing your calendar without using iCloud can present certain benefits. This manual will enlighten you about various techniques and platforms that facilitate easy sharing of your timetable with coworkers, family members or friends without relying on Apple’s cloud service.
Table of Contents
Calendar Setup:
Before you share your calendar with anyone, it’s crucial to keep it well-organized and up-to-date. One effective way of doing this is by creating individual calendars for various aspects of your life – work, personal activities, or hobbies. This method guarantees that people only access information pertinent to them. Also, activating calendar alerts for yourself and others can be an excellent strategy to avoid overlooking appointments.
Sharing Methods
1. Public Calendars:
- Built-in Option: To share your calendar, follow these steps:
- 1. Open the Calendar app.
- 2. Tap on “Calendars.”
- 3. Next to the calendar you want to share, tap the “i” icon.
- 4. Turn on the “Public Calendar” toggle.
- 5. Copy the generated link.
- 6. Share the link through email, messages, or social media.
- Anyone with the link can view your calendar, but they won’t be able to edit it.
- Third-party Apps: Apps like Fantastical or BusyCal offer public calendar creation with more customization options. You can set passwords, control visibility by date range, and grant editing permissions.
2. Email or Text:
- First, choose the calendar you wish to export and save it as a .ics file. Then, navigate to the Calendar application and select Calendars. Choose the specific calendar you want, click on More, followed by Export. If you want to restrict the dates being exported, select Range. Finally, share your .ics file through email, text message or any cloud storage service.
- Replicate and transfer single occurrences, ensuring to include specific information such as the date, time, venue, and any additional remarks. This method is effective for sharing particular meetings without disclosing your full agenda.
3. Third-party Calendar Apps:
Several calendar apps offer cross-platform syncing and sharing without relying on iCloud. Popular options include:
- Google Calendar: Set up a fresh calendar that is not associated with your Gmail account and distribute it to particular email IDs. Google provides detailed authority management, ranging from solely viewing permissions to complete editing access.
- Microsoft Outlook: You can share your Outlook calendar by including specific email ids or whole groups. Permissions for viewing, editing, and administering the calendar can be allocated by you..
- BusyCal: This purchased application provides the ability to share calendars via CalDAV or WebDAV servers, ensuring adaptability and the option to sync offline.
4. Social Media Calendars:
- Facebook: Incorporate events into the Events area of your Facebook profile. You can make these events accessible to everyone or just invite particular friends to view them. This allows others to view your itinerary through the well-known Facebook platform.
- Google Calendar Integration: Automatically share events or show your availability by linking your Google Calendar with social media platforms such as Twitter or LinkedIn.
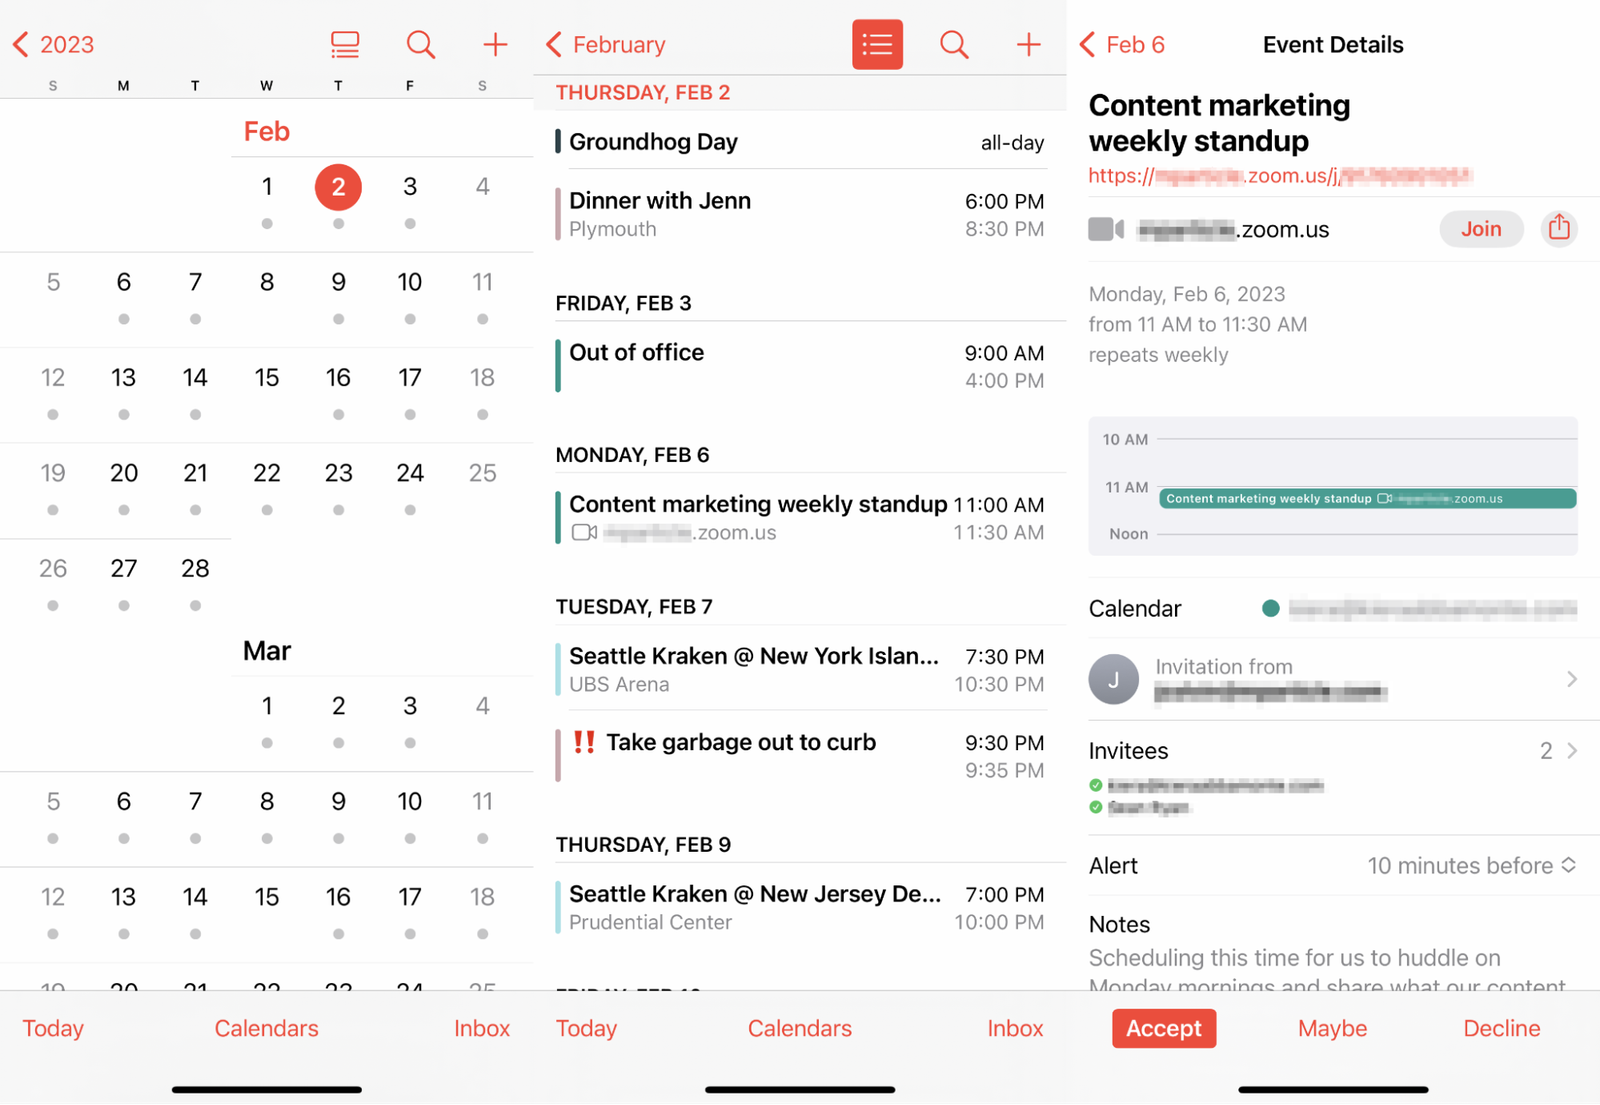
Tutorial for How to share calendar on iPhone without iCloud.
Privacy and security:
Revealing personal information is a part of allowing others to view your calendar.
- Permission levels: Select the suitable permission level for each recipient – whether they can only view, edit events, or manage the entire calendar.
- Shared content: Choose the details you feel comfortable giving. Think about setting up separate calendars for significant events.
- Link expiration: Give calendar access a time limit by setting an expiration date if you use public links
- Third-party app permissions: Review each app’s data access permissions and privacy policies before using it to share.
Additional Tips for Sharing
- Use descriptive calendar titles and event names for clarity it will give you a proper idea for the management.
- Add notes to events with important details or instructions.
- Set recurring events for regular activities to save time.
- Communicate changes or cancellations promptly to everyone who has access.
Sum up on How to share calendar on iPhone without iCloud
The appropriate way to share your iPhone calendar without using iCloud is determined by your specific needs and preferences. Consider aspects such as the access levels of the recipient, platform choices, and security issues to identify the best approach. The strategies and applications discussed in this guide allow you to easily distribute your agenda without depending on iCloud, thereby facilitating seamless teamwork and effective communication.
You might be interested in the following Articles:
Why do people prefer iPhones instead of Android?
How can I create a Google business account? A Complete Guide for 2024
How to use apple shortcut app? Complete Guide for 2024
Frequently Asked Question for How to share calendar on iPhone without iCloud
Can you share Apple calendar with non Apple users?
Yes, you can share with non-apple users by using method 1 in sharing option.
What’s better Google Calendar or Apple Calendar?
If you are a Mac user and have multiple Apple gadgets I would suggest Apple Calendar. Otherside Google Calendar is simpler and easy to use.
Does iPhone have a built in Calendar?
Yes, it has build in calendar. You can check on the application gallery area.
Where is my iPhone calendar stored?
It will stored in iCloud. You can enable an option in the settings area.